'Project Zomboid': Useful Game Settings For Multiplayer Server Hosts
Despite having a reputation for being a difficult survival game, “Project Zomboid” gives its players plenty of options to customize their zombie apocalypse experience with, whether it be for solo gamers or for groups of friends, via the freshly-implemented multiplayer.
Unforgiving difficulty isn’t for everyone, and there’s no shame in lowering some settings if it means that players will have a better time with the game. Having such freedom is great for casual groups who just want to have a good time surviving in “Project Zomboid’s” disease-ravaged version of Kentucky.
Before diving into the options, server hosts are advised to exercise some degree of caution and restraint when it comes to changing the in-game difficulty and other settings. Customizing the sandbox already detracts from the intended “Project Zomboid” experience, and tuning things too much can dampen the fun for everybody on the server.
Useful Server Settings
To edit server settings, head to the Host screen and click on the “Edit Selected Settings” button. This can be done even after starting the server for the first time, but just make sure that the correct server is selected.
For players who want an easier time but want most of the game to remain the same, head to the “Sandbox” section, and then under the “Players” tab, turn on the “Starter Kit” and “Weapon Multi-Hit” options. The world map can also be revealed in one of the settings for easier navigation for new players.
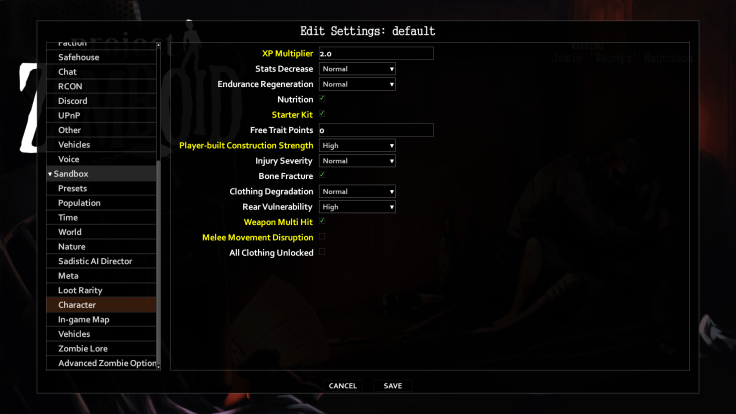
Project Zomboid settings for multiplayer servers Photo: Project Zomboid
This will make it so that all players will spawn with some provisions and a school bag containing a hammer and baseball bat. The multi-hit option will allow many long weapons to hit multiple zombies at once, which will make horde-clearing a little easier.
How To Sleep In Multiplayer
Sleeping is disabled by default in multiplayer, but server hosts can turn this on by going to the “Players” tab under the “INI” section of the settings. Click on the “SleepAllowed” checkbox to enable sleeping in multiplayer.
This will let players sleep those long and boring nights away. Every player on the server needs to be asleep for time to pass quickly, so this is best used for small groups only. For those who want to enable sleep requirements, toggle the “SleepNeeded” option. However, this may break the flow of the game.
- MOST POPULAR IN Technology